Create a Cookbook with Your Family During Quarantine
Ashley - Apr 15, '20 - Organization - Social Distancing - Cookbook Ideas - Design
It's easy to feel disconnected during quarantine. We know. We feel it too. We're missing our friends, our family members, and our colleagues while we're all observing the Stay Home orders. However, even with the Stay Home orders still in effect, this doesn't mean you have to stop working on that family cookbook. You can still work with your family on your cookbook using our contribution features - all from the comfort of your own home. Follow along - I'll show you how it works!
Getting started
First, if you haven't already, you need to create a cookbook project. This step is super simple. Just log into your account and click Create a Cookbook. It's an orange button that looks like this: ![]() Once you've given your cookbook a title, chosen your due date (Don't worry; this is just to give you an idea of your timeline. There's no deadline.), and chosen a theme, your fresh cookbook will be generated and ready for you to get to work!
Once you've given your cookbook a title, chosen your due date (Don't worry; this is just to give you an idea of your timeline. There's no deadline.), and chosen a theme, your fresh cookbook will be generated and ready for you to get to work!
Inviting your family
Here's how you include your family! Once you're in the cookbook designer, you'll see a blue bar at the top of the page with a few tabs you can select. The one you want is titled "Contributors." It looks like this:![]() Inside this window, you'll click on the Send Invitations tab where you'll input your family members' email addresses, type up a quick message, and then send the invite to their emails. Once they've accepted and start contributing recipes, your Contributors button will look more like this:
Inside this window, you'll click on the Send Invitations tab where you'll input your family members' email addresses, type up a quick message, and then send the invite to their emails. Once they've accepted and start contributing recipes, your Contributors button will look more like this: ![]() When you have a number beside your Contributors button, it means new recipes or photos have been added to your project.
When you have a number beside your Contributors button, it means new recipes or photos have been added to your project.
Just a note: if a friend or family member would like to contribute more than one recipe or photo, they will need to start their own CreateMyCookbook account. This will allow them to store all of the recipes on their own account as they are shared to yours. This is also how they will be able to edit the recipe after it has been submitted to you and order their own cookbook once the project is completed.
Adding recipes to your cookbook
Once a recipe has been contributed to your project, it'll land in your Recipe Box, not your cookbook. If you would like to include this recipe in the cookbook, you'll have to add it into the cookbook. You can do this one of two ways: 1) Create a recipe page in the cookbook by clicking on the orange +, then utilize the search bar to find your existing recipe, or 2) open your Recipe Box and use the checkbox on the left of the recipe title to select the recipes you would like to add. Once you have them selected, click the Batch Actions button to add them as pages in your cookbook.
Make it pretty!
Once you've added all of your recipes, it's time to add some personality to that cookbook! You'll want to make sure your font selections and colors match your cookbook theme. You'll also want to make sure that your selections don't cause your text to overflow so please pay close attention to any warnings you might receive. You'll be notified of a page warning when a yellow warning symbol pops up in the icons next to a page.
It'll look like this:
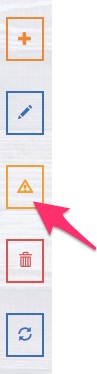
You'll definitely want to be sure you resolve all of those warnings before publishing your book. If you're having any trouble at all figuring out why you have a warning, shoot an email over to Support. They'll be more than happy to assist you with any of those issues!
We also have a great Help Article with advice on creating a beautiful cover for your cookbook. Click here to check it out!
Reviewing and approving your proofs
Once you're satisfied with your book, it's time to place your order! Simply click Preview & Order at the top of the page in the cookbook designer. You can then select your preferred binding styles and add-ons. Don't forget, just because you generate your book in a certain binding style doesn't mean you're required to order that binding style. It just means that if you choose to share your store page link with your family, they'll be able to order any of the binding styles you publish. Just keep in mind that our cookbook covers wrap differently depending on the style so you'll want to carefully review all of your cover proofs to make sure your design works across all of the styles you selected. You can always go back and edit your book after you generated proofs. Once you've made your edits, generate your proofs again, review them, and approve them to send them to your store page. Once your book has made it to your book store, you can place your order. Hooray!
Ordering and sharing the store page link
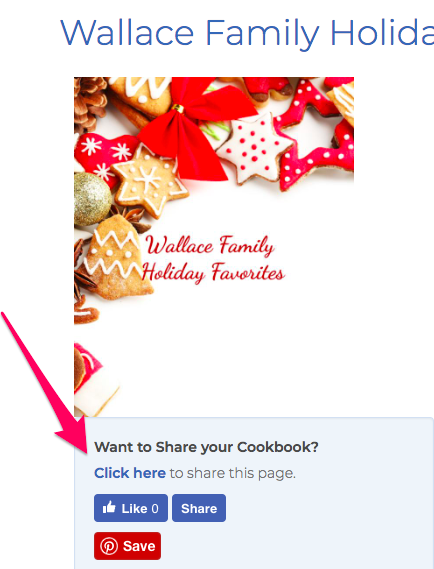
If your family contributed to your cookbook, there's a good chance they'll also want a copy, right? If that's the case, you can easily share the link to your store page by clicking on the shopping cart on the same line as your cookbook title. You'll see options under the image of your cover. You can email a link, or share on Facebook or Pinterest.
There you have it, folks! Time to get to work! We can't wait to see what you create!
XOXO, Ashley Elayne
Next: Five Tips for Two Week’s Worth of Social Distancing Meals