How to Use Natural Light to Improve the Quality of Your Food Photography
Guest Blogger - Jan 28, '21 - Design - Photography - Photos
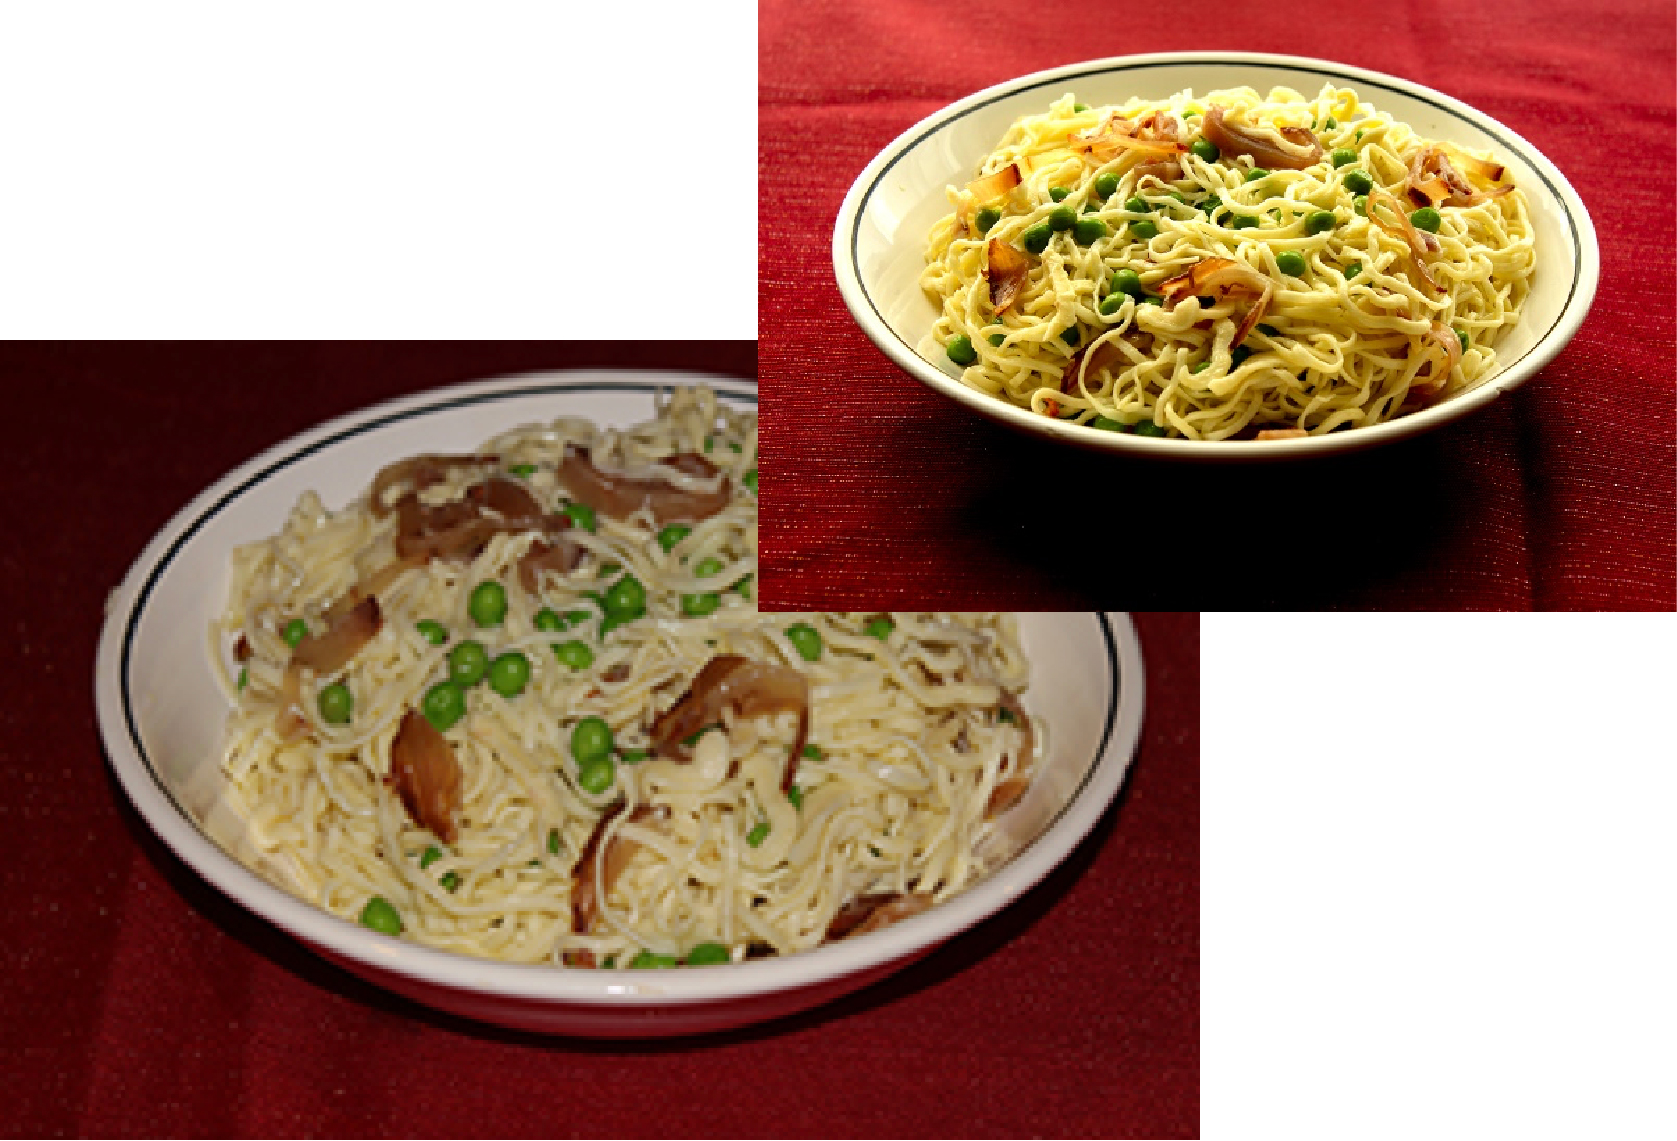
Controlling light is one of the most important considerations in creating the best possible image of your food. All too often, I see an image of food that looks washed out and completely lacking in depth and detail. This is usually caused by shooting the image using the built-in, or on-camera flash, to light the scene.
As a professional photographer, I have many tricks and tools to allow me to create the exact mood for each image. I have static lights and studio strobes to provide the light source. I have diffusers and screens to soften the light. I have flags to block the light and GOBO (go between objects) to create specific light patterns.
Having all these tools is a significant investment, but not one you need to make. You may ask, “If I don’t use the flash, how do I light the food?” The simplest way to improve your images, and light the scene, is to turn off your flash and use natural light. Using natural light can be a bit tricky and require some planning on your part.
Quality and direction of natural light.
Natural light will change throughout the day in color and intensity. The “Golden Hour(s)”, one hour after sunrise and one hour before sunset provide warm, golden light to your images. As the day progresses, the color of the light will become less yellow and bluer towards the noon hour and less blue and more yellow as the day continues.
To take advantage on the Golden Hours, set your shot near an East facing window in the morning and a West facing window in the evening. During the rest of the day, choose a South facing window.
Overcast days are considered optimal for a soft, consistent light quality. Partly cloudy days present a challenge as the light will continually change. Bright sunny days may require you to diffuse or soften the light. This is simply done by having shear curtains over the window or by hanging a white sheet in front of the windows.
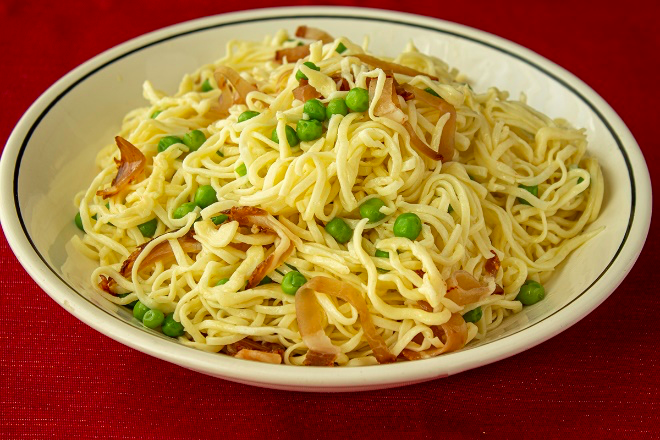
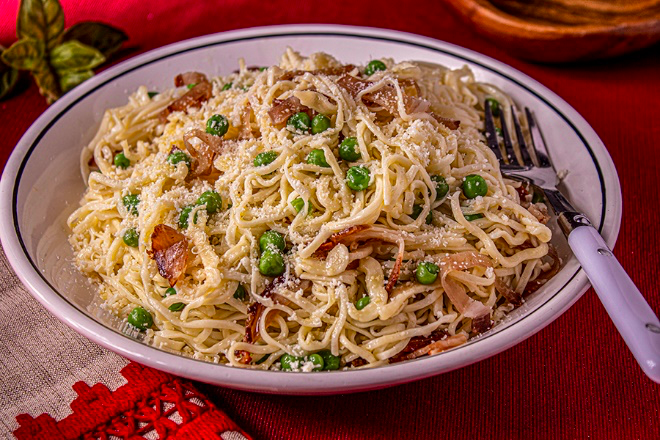
Generally speaking, we light the food with two or three different sources: key light (main light source); back light and/or fill light. The composition of your food and angle of your shot will determine how each of these are used. In addition, the light source will determine from what direction you shoot the food. You can choose to position the shot with the window behind the food (back lit) or shooting with the window to the left or right of the food (side lit). Think of the window being the key light or back light. To reduce shadows that might hide detail or depth to your food, use a reflector (fill light) positioned across from the light source to bounce light into the food. This can be done by using a piece of white foam core (available at office supply stores) or a baking sheet covered with aluminum foil.
In summary, stop using the built-in flash when shooting your food. Use natural light to set the mood of your shot. Always used a reflector opposite your main light source to add depth, dimension, and detail to your images.
For questions or comments, you can reach me at [email protected] and view my images at www.foodshooter.us.
Next: Cookbook Story | Cooking with Camden