5 Tips for your Personalized Cookbook Cover
Courtney - Jul 18, '16 - Photos - Cookbook Ideas - Design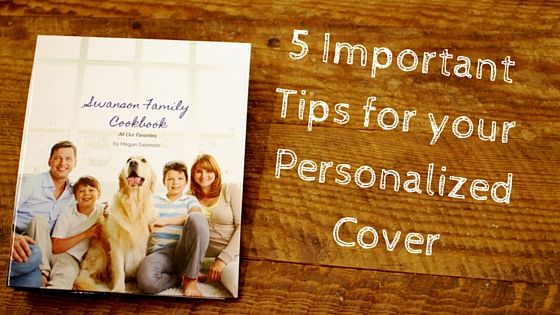
So you are committed to your customized cookbook and you are ready to start your cover. After all, the cover is the part that all of your friends and relatives will see when you proudly display your work on your kitchen counter. We want your authorship to look SO professional and personal all at once that you choose to delegate your one cookbook stand to this cookbook. The good news is- it is very easy to make a cookbook that both your mother and Marcella Hazan would be proud of. But there are some notoriously easy mistakes that you should know of to make sure that these dreams come true. For this reason we give you: 5 Important Tips for your Cookbook Cover Design.
#1 Choose your image wisely
you’ve got to kiss a few frogs to find your prince
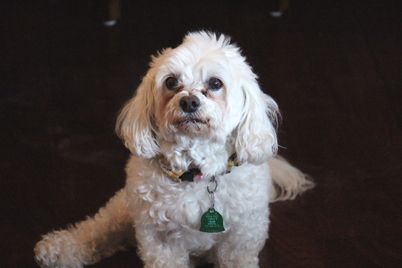
The first thing you need to know about choosing your cover image is that picture quality matters. We recommend that you have a resolution of at least 800 x 1000 on your image, although an ideal resolution would be 2400 x 3000. The good news is, you do not need a fancy camera to take the perfect photo for your cover. In order to demonstrate the DOs and DON’Ts of your photo choice, I have made a cover using an image of one of my most cherished family members: my dog Cooper.
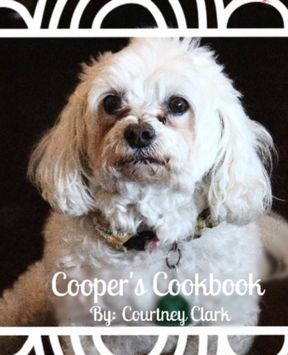
DO NOT hastily save a picture off of Facebook and directly upload it into our template. If you want to use a Facebook photo you must be very careful...or else poor Cooper will end up looking all pixelated and the true essence of his cooking abilities will not be captured.
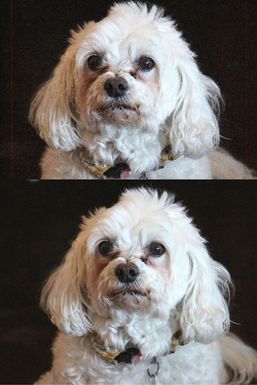
DO upload a high resolution picture of Cooper into the “picture” tab of your template. If your photo was uploaded from your camera or phone directly to your computer, make sure that you use that file. If you retrieve the photo from email you must make sure that Cooper is sent to you in the highest quality (choose to send the “original” file rather than a small, medium, or large version). If you must download the Cooper picture off of Facebook, do not simply right click the image and click ‘save image as’. The best way to make sure Cooper is not pixelated is to click on the image and go to Options → Download. That way you will not lose photo quality in the process.
#2 Cropping is your Friend
Let it help you
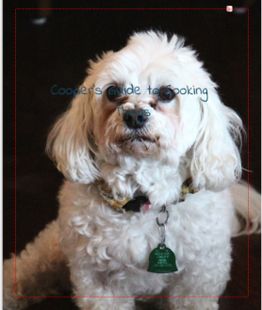
You are going to want to drag the photo around once you upload it, but the online template doesn’t let you move it automatically. Let’s say I upload Cooper’s picture and his poor little ear is cut off.
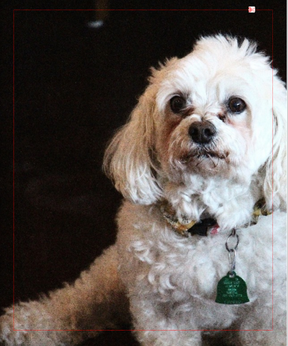
The way to fix this is to edit the photo itself and to make sure it is cropped correctly. The red lines on the template are meant to show you which parts of the photo will be wrapped around the edges of the book. I care far too much about Cooper’s right ear to let that happen. If you click the edit tool on the template:
- Go to the “Picture” tab
- Click on “My Photos”
- Hover your mouse over the photo you uploaded and click the edit tool on that photo
- Choose “Crop”
- Use the “Cover” dimensions to center the photo how you want it

#3 Center your image for PRINT
Front-and-center is really front-and-slightly left
When you center your cover, remember that it will eventually be printed on a real book with a spine (exciting I know!). This means that the cover image will naturally be shifted to the right when it is put into print. We recommend that you “center” the image ever-so-slightly to the left to counter this problem.
#4 Be careful about landscape photos
They can be deceiving
Let’s say that I find a landscape picture of Cooper and I want to use it for my cover. Everything will go perfectly if the picture has enough crop-able space around it. The photo I have been using happens to be a landscape photo and it works beautifully. That is mainly because there is plenty of space on either side of Cooper that can be cut out. Also because he is so darn cute.
But if there are other dogs next to Cooper in the photo, they would likely be cut out of the cover. So, make sure your landscape photo has extra space on either side for cropping. A group picture in landscape could be problematic because some members will be cut off the page. If you are really in love with a landscape photo that does not have extra cropping space, you can overlay the image on a background before you upload it to our template so that it has “borders” to keep the dimensions in check.
#5 Make sure your text is readable
It’s not what you write, it’s how you write it
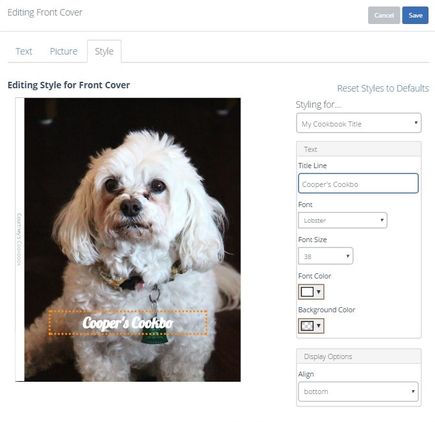
Once you have come up with your title or text, you MUST make sure that it is readable. We recommend that you use a background for your text if you are unsure if it will stand out against the image. For example, if I put text with a transparent background on my cover, the words will be lost in the black background and Cooper’s furry face.
That’s no good. Make sure you add a colored background behind the text to make it stand out. You can choose color, font, background, and placement in the “Style” tab.
If you want to get even more creative, you can use the edit tool on the photo to add stickers, effects, and more text options to your cover.We hope these tips covered all the basics of designing your cookbook cover. If you have any questions, or want more advice on your cover, please let us know! There will certainly be more fun tips to come.
Next: Marrying People and Recipes